My Journey to the Lab
Hi, my name is Jessica Topp, and I’m currently a third-year undergraduate student at the University of Glasgow. From as far back as I can remember, I knew I wanted to be surrounded by science, but my road to chemistry wasn’t exactly straightforward. Throughout school, my career ambitions ranged from becoming a nephrologist to a virology. So, when it came time to apply to university, I struggled to choose just one area of science. In the end, the best of both worlds: biochemistry.

After travelling nearly 2,000 miles from Portugal to Scotland for university, sitting through over 340 lectures, and putting in many hours of lab work (including numerous titrations), I began to feel my interests shift. During my second year, I was thrown straight into the deep end of chemistry with quantum mechanics, which, ironically, ended up being one of my favourite topics. As the year went on and I was introduced to spectroscopy, stereochemistry and organometallics, my passion for chemistry only continued to grow. Eventually, I found myself looking forward to sitting my chemistry exams (quite hard to believe). That growing enthusiasm led me to switch my degree to Chemistry this summer.
With a new goal in mind and a 118-day summer fast approaching, I took this as a perfect opportunity to apply for a summer internship. Chemistry is quite a broad field, and I felt as though it was essential for me to gain hands-on experience working on a lab-based project in a professional research environment early on in my academic journey.
While trying to find a summer placement, I was lucky to get in touch with Dr. Hessam Mehr, who was happy to chat with me about potential project ideas.
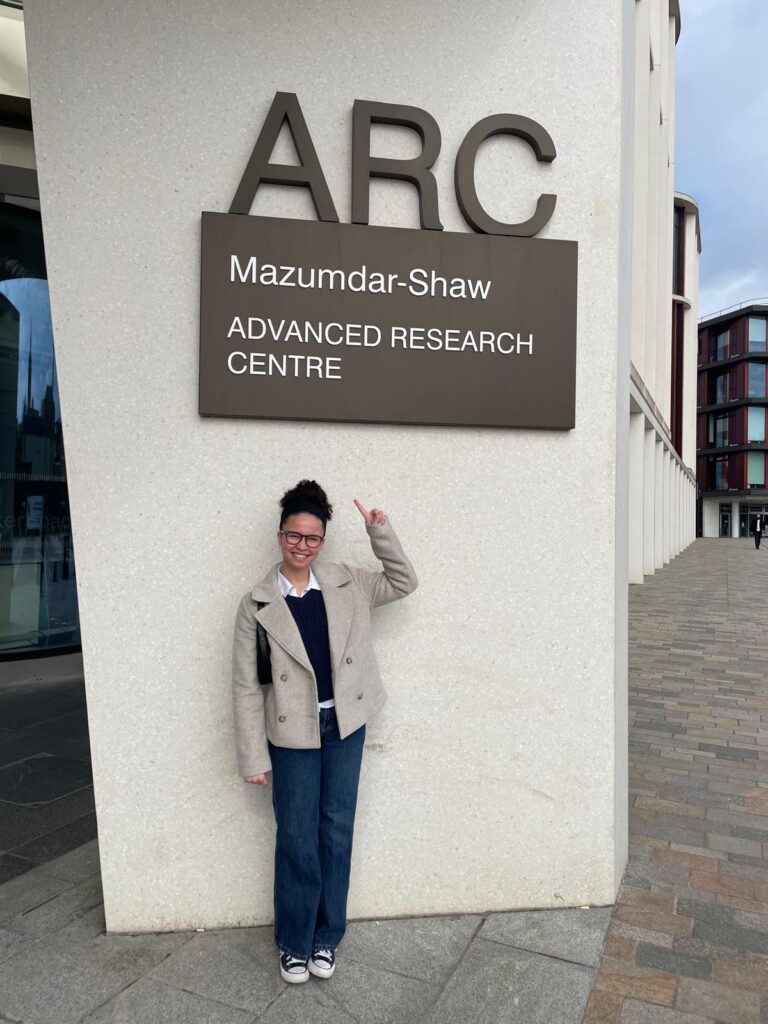
Once exams were over, it was time to begin my internship. Transitioning from undergraduate teaching labs to the Advanced Research Centre (ARC) was a big jump. I found myself working alongside experts in their respective fields and attending group meetings; these experiences made it feel more like a real research environment than anything I’d encountered so far in my academic journey.
First Introduction to My Project
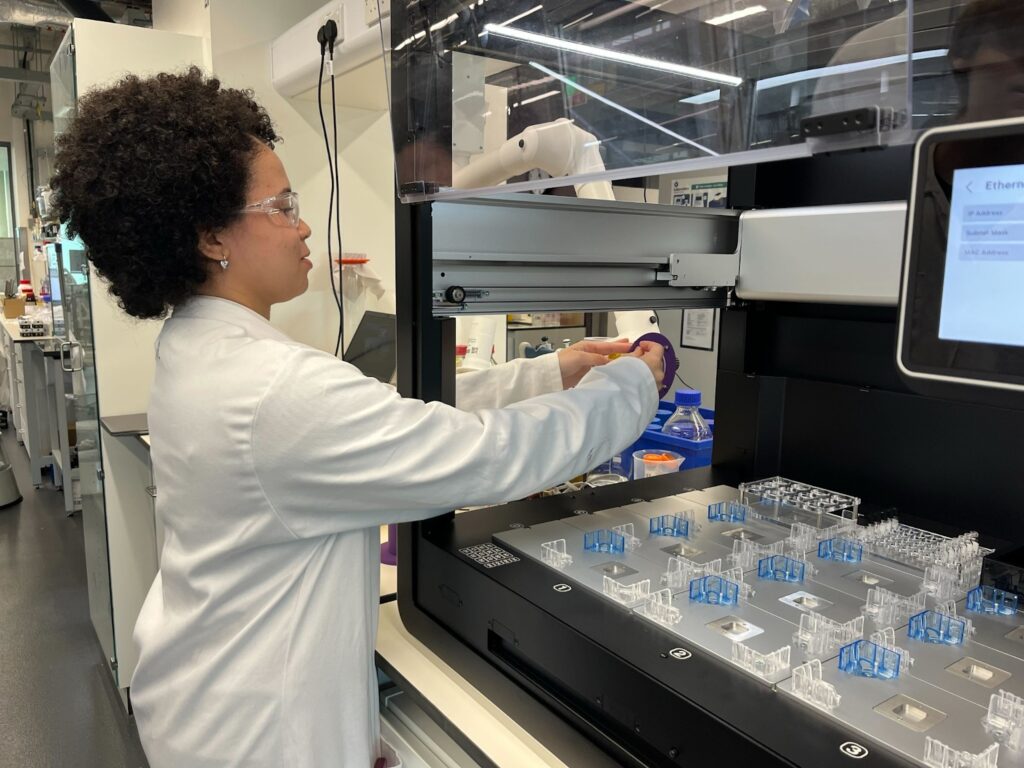
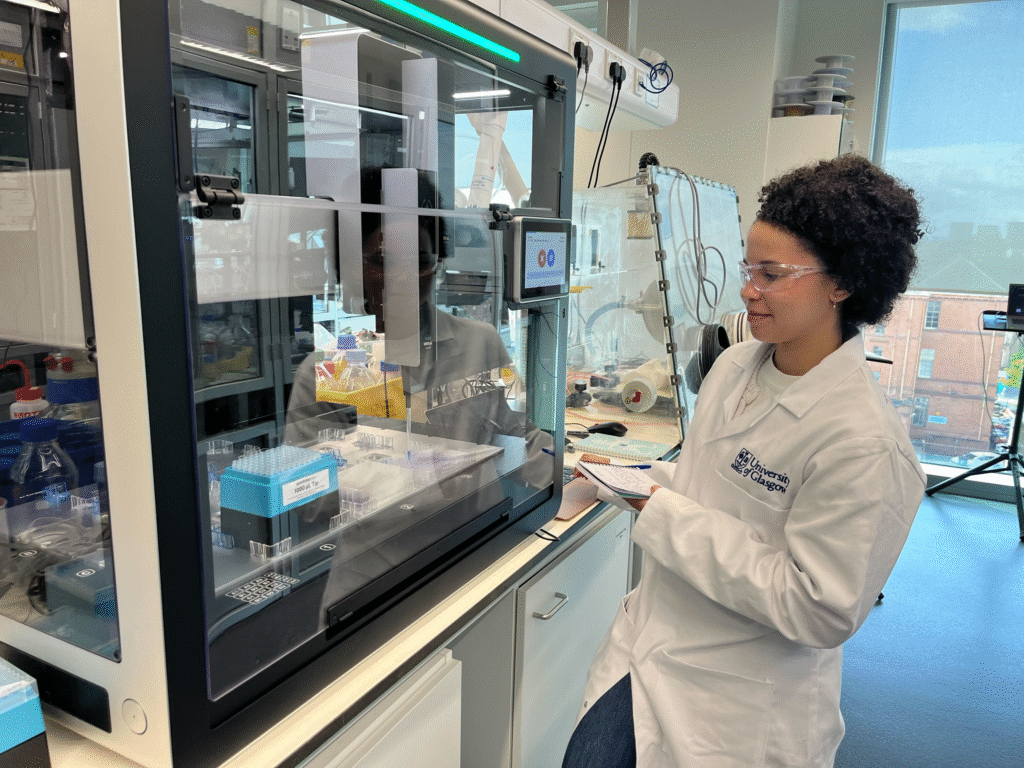
I remember walking into the lab for the first time and being introduced to the Opentron Flex. The machine could only be described as a pipetting robot in large box, with a touchscreen. Originally, the Opentrons was designed for more biologically applications, however my project involved the idea of utilising it to do chemistry. I was immediately intrigued by this idea of adapting new technology in the industry for chemical purposes, so, like any normal person, I decided to read almost the entire Opentron Flex lab manual! I was dedicated to this project and was hugely grateful to be trusted with such an intricate machine as an undergraduate student.
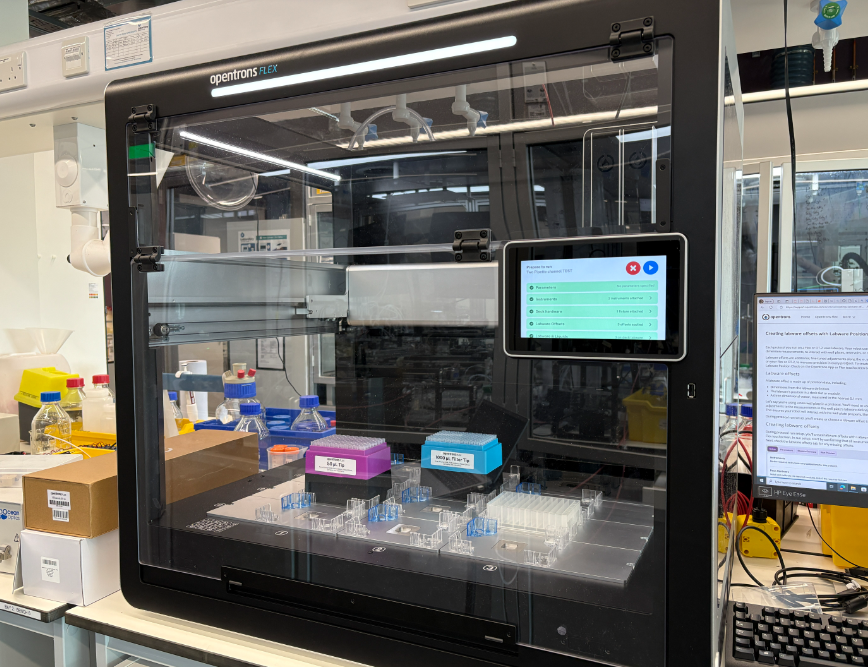
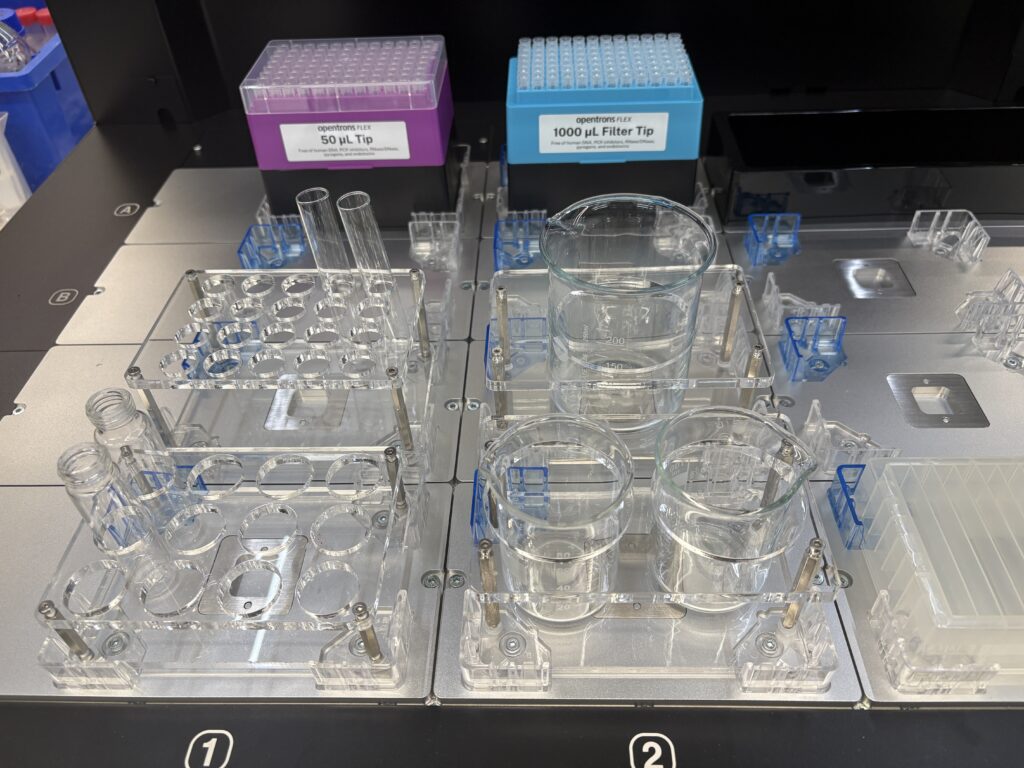
The information from the lab manual described the Opentron Flex as a ‘liquid-handling robot designed for high throughput and complex workflows’. The machine came with labware such as pipette tips, reservoirs and well plates, which allowed you to customise the layout of your protocols onto the deck. Along with this, whilst digging around in the lab cupboards, I had discovered laser-cut custom-made beakers and vial holders. The designing and importing of custom-made apparatus holders allows the Opentrons to be really adaptable to more chemical-based protocols.
The protocols can be designed in several ways: you can use the protocol library, where people have pre-made protocols already, or a protocol designer, which is a more visual way to map out your protocol by indicating the position of reagents and creating steps, or by using Python. And as a person with relatively little knowledge of using Python, the protocol designer was my first approach to designing protocols. It has an approachable platform, whereby you add the positions of your labware and can specify the volumes of reagents in each well plate. You can then add steps such as transferring liquids between labware whilst specifying the speed of liquid transfer, and whether you want to mix the liquids. So, using the protocol designer, I transferred liquids between well plates, and despite this being a relatively simple task, I was ecstatic!
From then on, I decided to import all the custom-made beaker and vial holders into the Opentrons flex, which involved measuring their dimensions and inputting them into the custom-labware designer application, then exporting those as a JSON file to the Opentrons. And before I knew it, I was transferring water between chemical beakers, which was the first step towards more chemical applications.
Integrating Python into the Protocols
To have more control over the Opentrons, it was only inevitable that Python would have to be involved. And as someone who had a very limited knowledge of Python, there is no better way to learn than exposure. So each morning, I dedicated time to personal Python projects such as rock, paper, scissors, number guesser, etc. I found that watching video tutorials was the best way to practice Python, and it helped with the reasoning as to why you need to write certain lines of code.
After getting familiar with the basics, I applied my understanding of Python to the Opentrons application programming interface (API). The API acts as a bridge between your Python code and the Opentrons. It’s sort of a specific language you need to use that the Opentrons can interpret, and so run protocols. The Opentrons have a list of commands and prompts you can use, and it allows for further control over the machine.
After long days of practice, using Python to create protocols allowed me to perform serial dilutions, liquid transfers to reservoirs and even precise pipetting into well plates to debut my art career! The main benefit of using Python was that it made the edit-as-you-go process much easier, as I only had to import one file, and I could edit the Python, and the Opentrons would update the protocol. Whilst using the protocol designer, I would have to import a new protocol file each time I made an edit, which isn’t efficient.
Initial Chemical Experimentation in the Opentron Flex
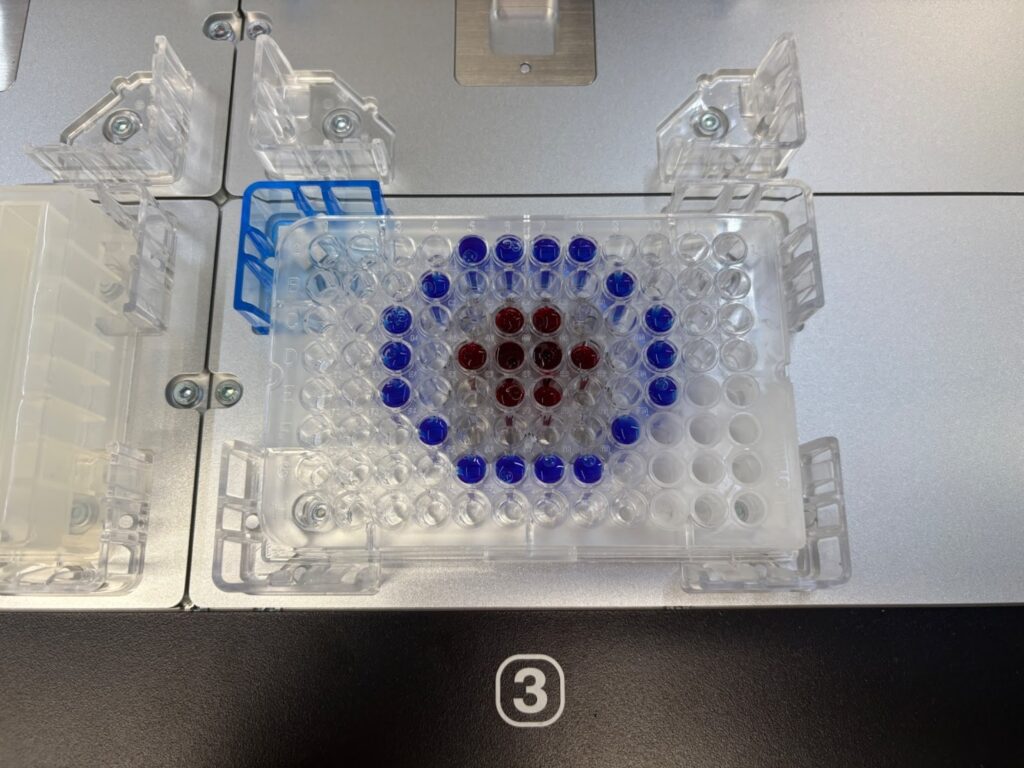
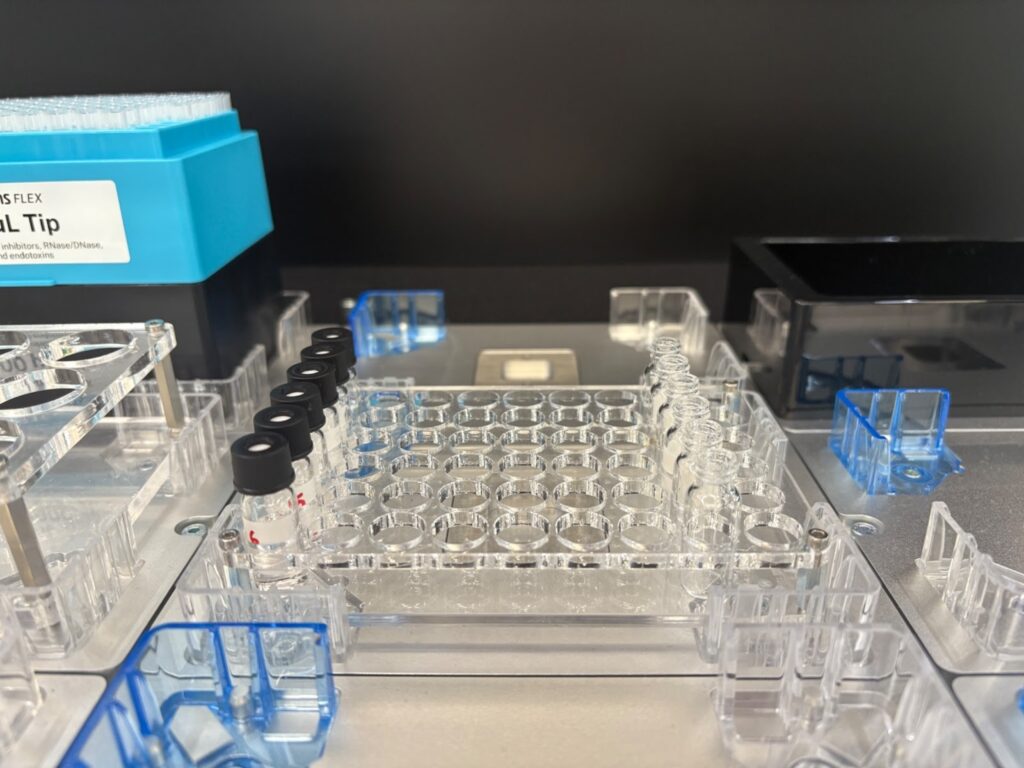
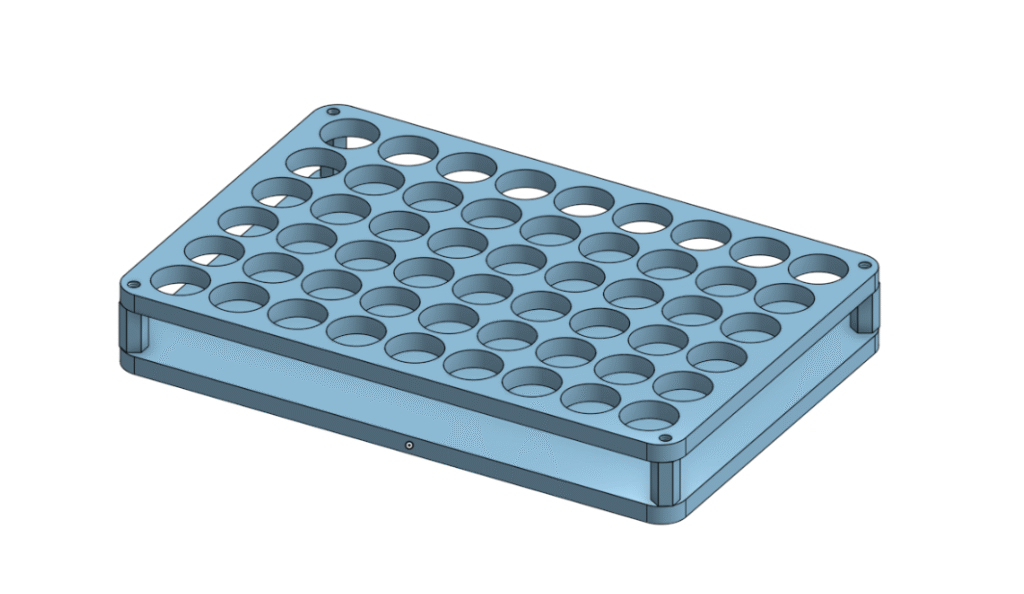
After playing around with the functionalities of the Protocol designer application and designing many, many protocols, I truly felt like an expert on the Opentrons. With this came my first collaboration with a Master’s student: Kyriaki Vergitsi. Our collaboration involved mixing three reagents: erythromycin, pyridine and acetic anhydride, to determine the optimum ratio for erythromycin acetylation. These reagents needed to be pipetted and mixed into High Performance Liquid Chromatography-Mass Spectroscopy (HPLC-MS) vials for analysis.
My aim for the project included designing a custom HPLC vial holder for the Opentrons and using Python to design the protocol.
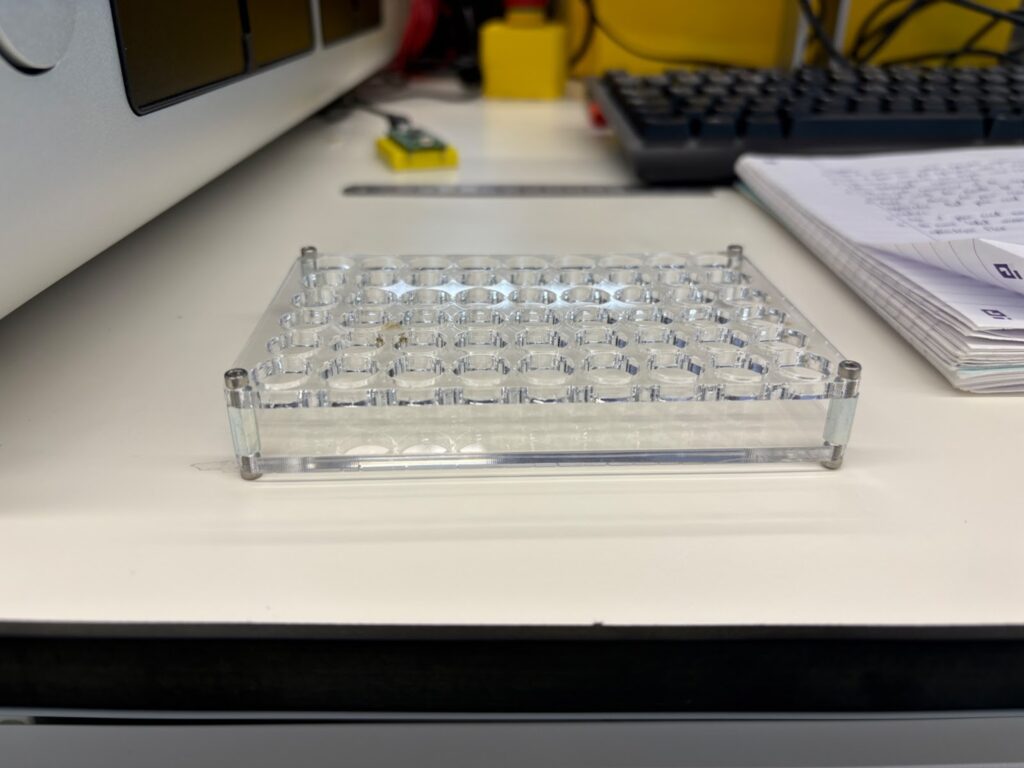
Designing the HPLC vial holder involved noting down precise measurements of the vials and calculating the approximate total number of HPLC vials I could use in one holder. And to visualise what the model would look like, I utilised OnShape. The face of the model was saved1 and transferred to Inkmaster, where it could then be laser cut onto an acrylic sheet. The two acrylic pieces were connected via standoffs and were ready to use for protocols.
I am thoroughly grateful that I had the opportunity to design my own labware holder, as it gave me the chance to use Onshape and a laser cutter, all of which I had no previous experience with.
Side Quest to Heriot Watt University for Opentron User Day
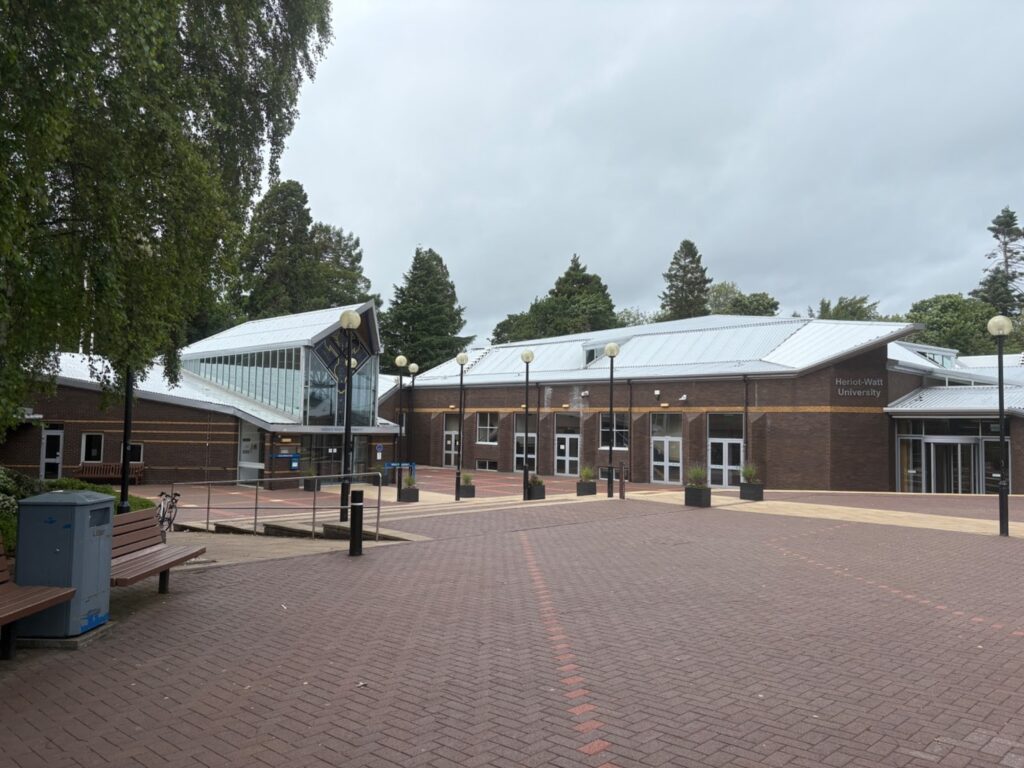
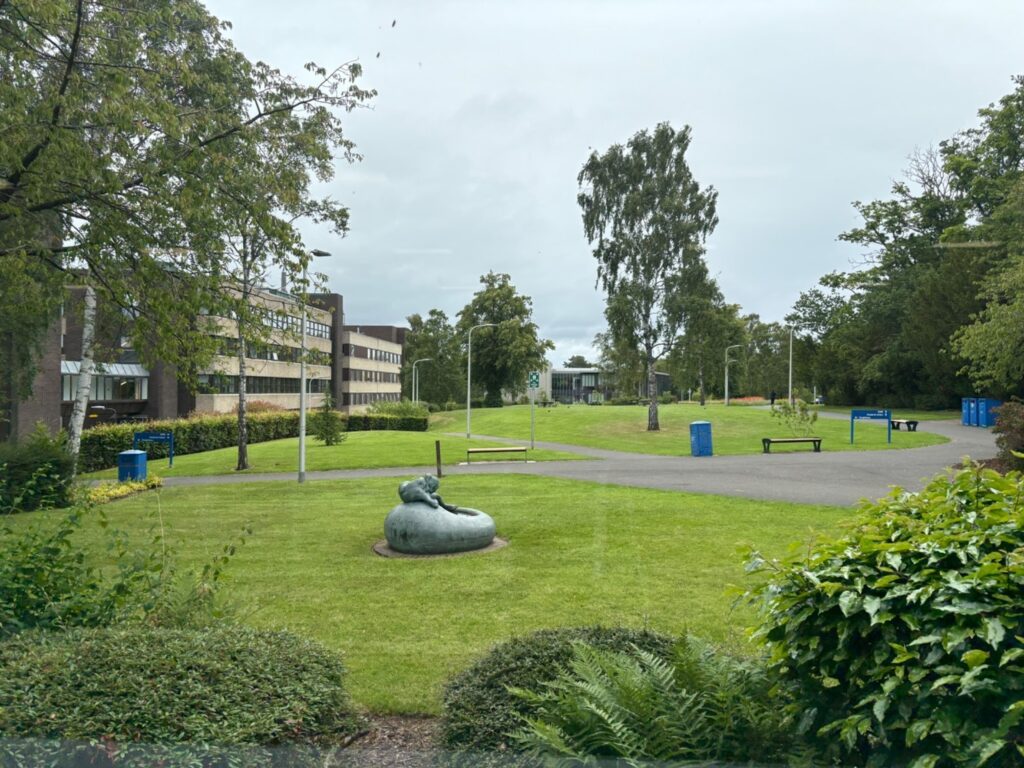
Whilst I was working on constructing my HPLC vial, I received an email about an Opentrons User Day at Heriot-Watt University (crazy coincidence). So, after discussing with Hessam, I saved the date in my calendar and booked my train tickets as soon as I got home. When the day came along, I took the train to the cosy town of Haymarket, and then a 35-minute bus to Heriot-Watt University. I was pleasently surprised by how immersed the University was in nature, and its architecture was beautifully designed.

The event started with a short introduction to the history of the Opentrons company, their company goals, as well as their future intentions with the machine. During a visit to their lab, they demonstrated how the machine worked, and the different labware modules they have, such as a bioshaker and a heat plate. There was a short interval for lunch, which was a feast and had a ton of options – Including chocolate cake!
Following this, a few research groups presented their usage and applications of Opentrons for their research. One notable example included the use of microfluidics. Whereby, they 3D printed a small microchip which had a hollow tube and a small funnel-like opening, where they controlled the dispensing speed into the funnel, and we watched the tube fill up with liquid. They were working on controlling the dispensing speed of the pipette to generate small water-filled droplets into an oil-containing well. Seeing the different groups’ unique use of the Opentrons was incredibly inspiring.
Back to Work Designing the Protocol for the Experiment
After returning from my little expedition to Heriot-Watt and with my HPLC vial rack assembled, I had to put my head down and design a protocol for the experiment. This involved lots of trial and error, working out the optimal height of the pipette tip in the HPLC vial without it touching the liquid and becoming contaminated. Another issue we came across was that, due to methanol being highly volatile, it was hard for the reagents to stay in the pipette tip as it moved from the reagent vials to the HPLC vials. This was solved when I edited the code to include a small air gap in the pipette after each transfer. This meant that after the pipette aspirated a volume of reagent, it also aspirated some air, which acted as an air gap. This modification was successful; however, we also found that during mixing, there would be a tiny residual of the liquid still in the pipette. This was solved by including a blow-out feature after dispensing the reagent into the HPLC vials, to ensure that all the liquid had been dispensed.
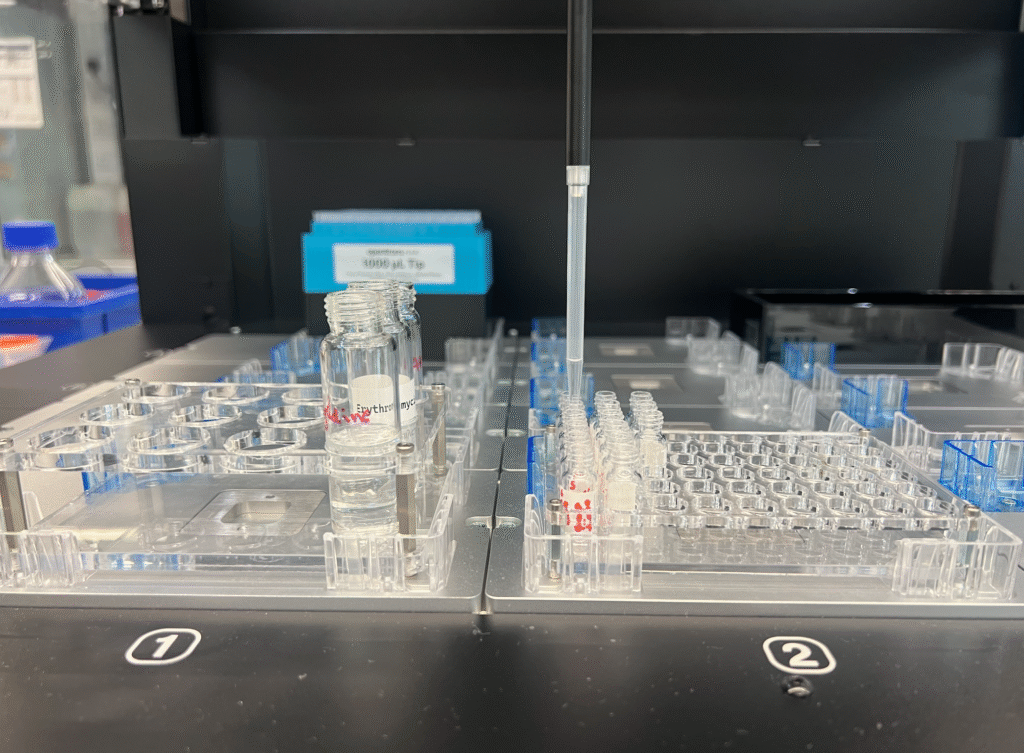
The initial reagents used were acetic anhydride, erythromycin and sodium acetate, all dissolved in methanol, which we would later replace sodium acetate with pyridine. These were in large vials, and the goal was to use the Opentrons to pipette a specified volume of each reagent into the HPLC vials. But each vial had to contain a different ratio of reagent volumes. Eventually, the protocol was developed and the reagents were successfully pipetted into the vials. However, they were too concentrated for the HPLC-MS to analyse, and so my next aim was to produce a diluted vial mixture. This slightly complicated the procedure as I would have to distinguish two rows of HPLC vials, one containing the mixture of reagents and the second containing a 1/10 dilution of the mixture by adding 900ul of diluted water along with 100ul of the initial mixture. But after modifying the code, it was successful, and the HPLC-MS was easier to analyse.
from opentrons import protocol_api

metadata = {
    "protocolName": "Acetylation of Erythromycin (Acetonitrile Solvent)",
    "description": """'Mix erythromycin, sodium acetate, and acetic anhydride into 1 mL HPLC vials using specified ratios""",
    "author": "New API User",
}

requirements = {"robotType": "Flex", "apiLevel": "2.16"}


def run(protocol: protocol_api.ProtocolContext):
    tiprack_1 = protocol.load_labware("opentrons_flex_96_filtertiprack_1000ul", location="A1")
    tube_rack_20ml = protocol.load_labware("new_12_tuberack_20000ul", location="D1")
    hplc_rack = protocol.load_labware("custom_54_tuberack_2000ul", location="D2")
    left_pipette = protocol.load_instrument(
        "flex_1channel_1000", mount="left", tip_racks=[tiprack_1]
    )

    left_pipette.flow_rate.aspirate = 200
    left_pipette.flow_rate.dispense = 200
    left_pipette.flow_rate.blow_out = 727
    total_volume = 1000
    air_gap_vol = 20

    # source tubes
    acetic_anhydride = tube_rack_20ml.wells_by_name()["A4"]
    erythromycin = tube_rack_20ml.wells_by_name()["B4"]
    pyridine = tube_rack_20ml.wells_by_name()["C4"]
    acetonitrile = tube_rack_20ml.wells_by_name()["A3"]

    ratios = [[0.6, 0.2, 0.2], [0.4, 0.2, 0.4], [0.2, 0.6, 0.2],
              [0.4, 0.4, 0.2], [0.2, 0.2, 0.6], [0.2, 0.4, 0.4]]

    er_fractions, acoac_fractions, py_fractions = list(zip(*ratios))

    left_pipette.pick_up_tip(tiprack_1["G1"])
    for er_fraction, well in zip(er_fractions, hplc_rack.wells()):
        volume = er_fraction * total_volume
        left_pipette.aspirate(volume, erythromycin.bottom(z=5))
        left_pipette.air_gap(air_gap_vol)
        left_pipette.dispense(volume + air_gap_vol, well.bottom(z=-10))
        left_pipette.blow_out(well.bottom(z=0))
    left_pipette.drop_tip()

    left_pipette.pick_up_tip(tiprack_1["H1"])
    for acoac_fraction, well in zip(acoac_fractions, hplc_rack.wells()):
        volume = acoac_fraction * total_volume
        left_pipette.aspirate(volume, acetic_anhydride.bottom(z=5))
        left_pipette.air_gap(air_gap_vol)
        left_pipette.dispense(volume + air_gap_vol, well.bottom(z=-12))
        left_pipette.blow_out(well.bottom(z=0))
    left_pipette.drop_tip()

    left_pipette.pick_up_tip(tiprack_1["A2"])
    for py_fraction, well in zip(py_fractions, hplc_rack.wells()):
        volume = py_fraction * total_volume
        left_pipette.aspirate(volume, pyridine.bottom(z=5))
        left_pipette.air_gap(air_gap_vol)
        left_pipette.dispense(volume + air_gap_vol, well.bottom(z=-12))
        left_pipette.blow_out(well.bottom(z=0))
    left_pipette.drop_tip()

    # NEXT STEP: add 900uL to each of the second row of vials
    for well in hplc_rack.wells(["A2", "B2", "C2", "D2", "E2", "F2"]):
        left_pipette.pick_up_tip(tiprack_1["B2"])
        left_pipette.aspirate(900, acetonitrile.bottom(z=5))
        left_pipette.air_gap(air_gap_vol)
        left_pipette.dispense(900 + air_gap_vol, hplc_rack.bottom(z=-12))
        left_pipette.blow_out(well.bottom(z=0))
    left_pipette.drop_tip()

    # NEXT STEP: Now add 100uL to each of the second row from the first row of vials
    column_1_wells = hplc_rack.columns()[0:6]
    column_2_wells = hplc_rack.columns()[1:6]
    tips = tiprack_1.wells()[25:31]

    for source, dest in zip(column_1_wells, column_2_wells):
        left_pipette.pick_up_tip(tips)
        left_pipette.aspirate(100, source.bottom(z=-12))
        left_pipette.air_gap(air_gap_vol)
        left_pipette.dispense(100 + air_gap_vol, dest.bottom(z=-12))
        left_pipette.blow_out(dest.bottom(z=0))
    left_pipette.drop_tip()
The Python script details the labware and reagents used in the protocol as well as their deck position in the Opentrons. The speed of aspiration and dispensing of liquids is also specified in microlitres per second. The code also contains the information regarding the blow out speed and volume of the air gap. Using the list of ratios, the volume of each reagent is calculated as a fraction of the total volume required in the HPLC vial. The script then describes the dilution of the initial HPLC vials in acetonitrile.
The main takeaway from this experiment was to make sure to read through your Python code and really visualise each step before you run it on the Opentrons.
Starting to Push the Boundaries of Opentrons Customisations
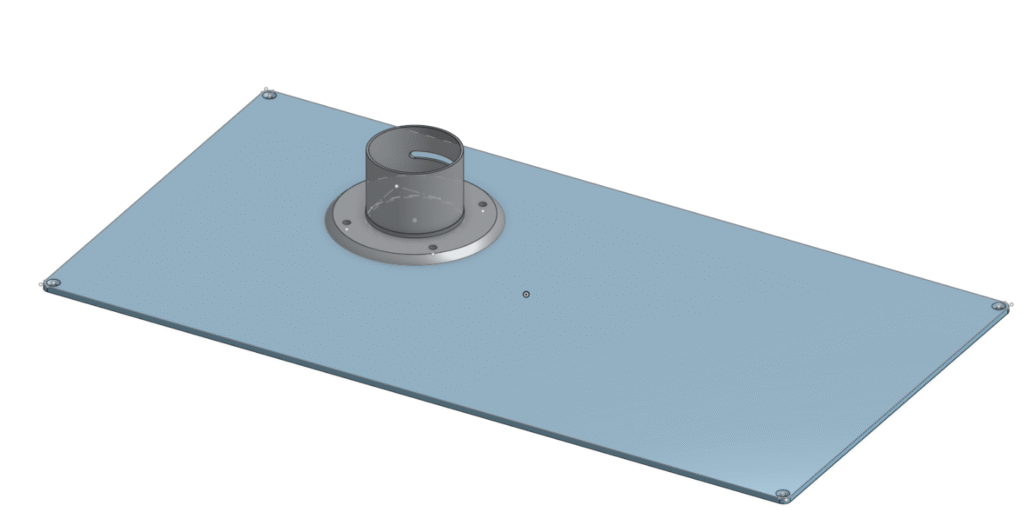
With the collaboration being my first successful integration of chemistry into the Opentrons, this broadened the horizons of how I could optimise the machine to make it better suited for chemical experimentation, whilst being lab safe. The previous reagents were dissolved in methanol, which is quite volatile, as well as pyridine having an unpleasant smell. The idea to include a fume extraction arm in the Opentrons was proposed.
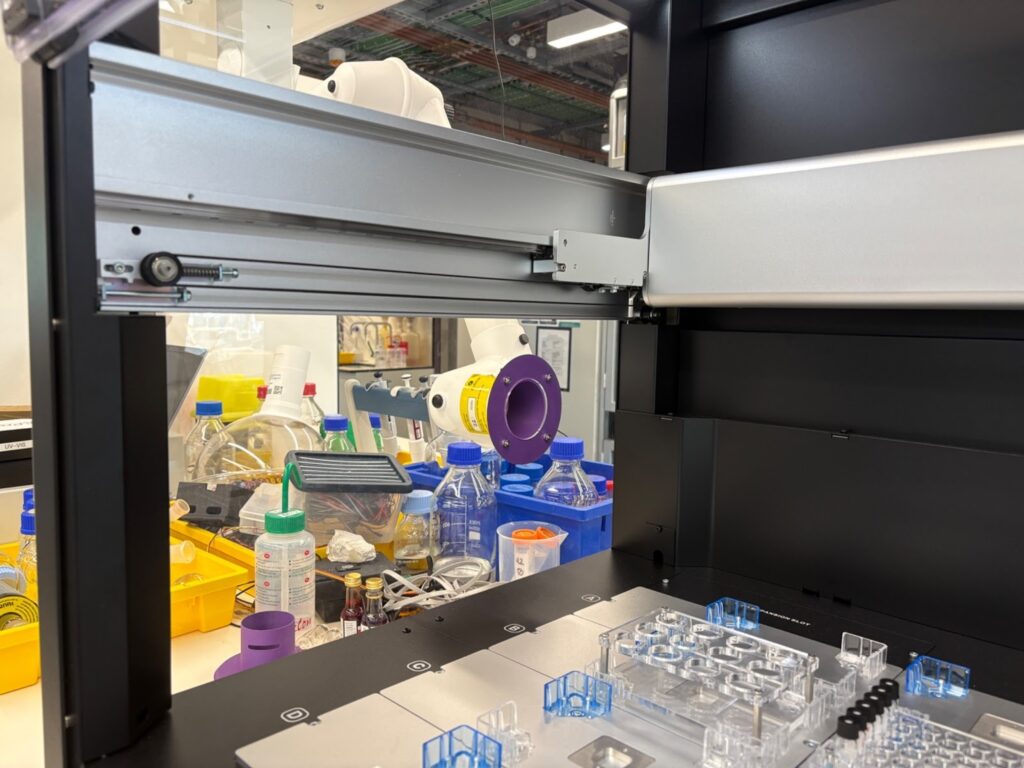
So I went to work taking measurements of both the extraction arm and the Opentrons window panel, to design a model onto OnShape. This also meant that I would have to laser-cut a new window panel for the Opentrons. And with my (amateur) skills of using Onshape previously to design my HPLC vial holder, I created a rough design of a flange which would connect the fume extraction arm to a hole in the new window panel. The production of the flange involved using a 3D printer, which again was a completely new experience for me. They were the fastest 3D printers I had ever seen, and my model was done within 2 hours!
However, my dimensions were off, and so my flange didn’t exactly fit tightly into the extraction arm, with a large gap, which would be inefficient for gas extraction.
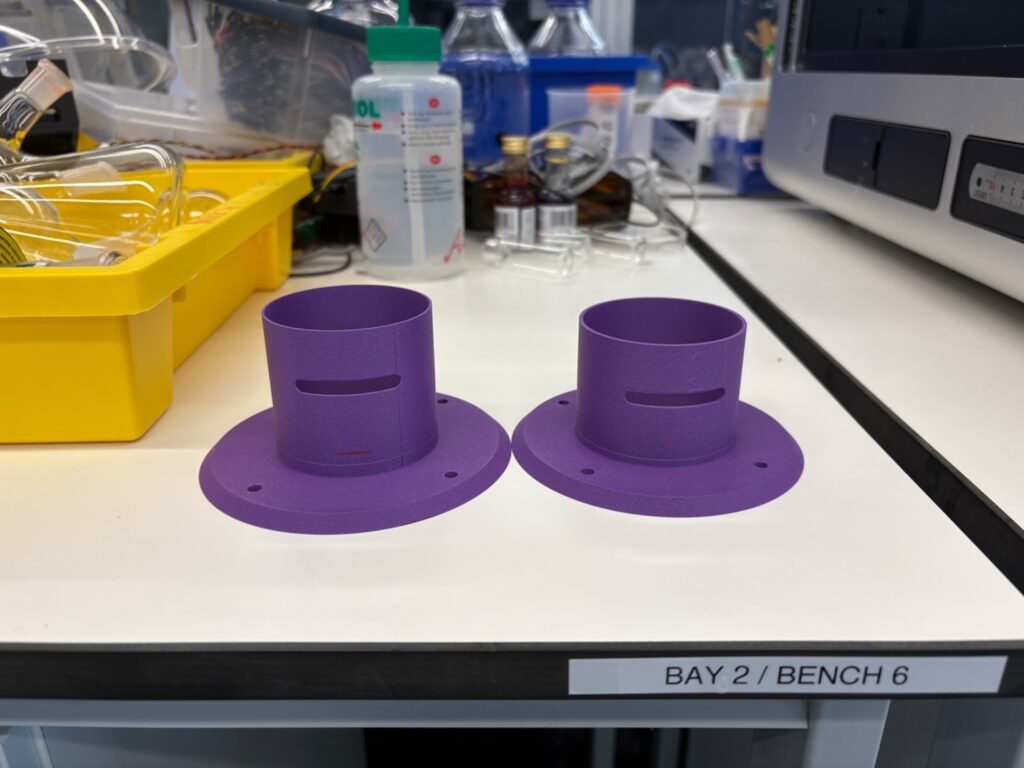
So I re-did my measurements and adjusted my model accordingly2, and printed a new model, which was inserted into the extraction arm perfectly. I then bolted the flange into the window panel, and the fume extraction was now set up! This physical modification adds an element of lab safety to the Opentrons, now allowing me to use chemicals with potent fumes.
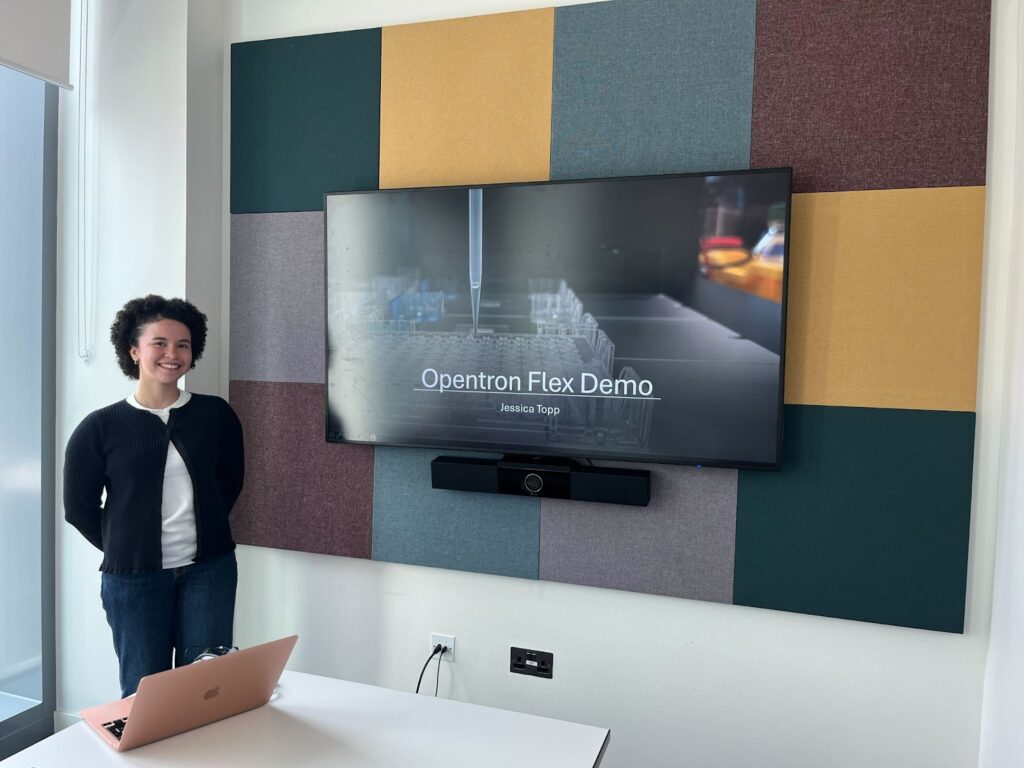
Showing Off My Knowledge with an Opentrons Demo
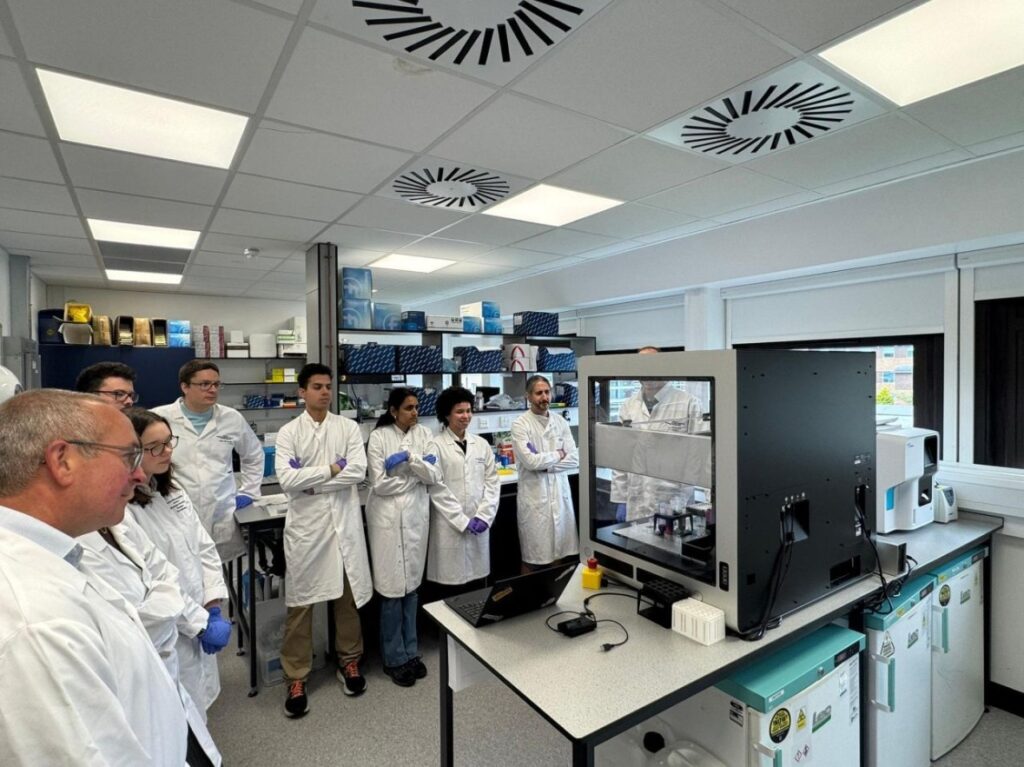
With my newfound knowledge and confidence in using the Opentrons, I was given the opportunity to show it off to my colleagues in the research group. I gave a short presentation giving some context behind the Opentrons and its labware, before heading into the lab to give a demonstration of how the machine works, along with how to design protocols and import them onto the machine.
My Final Thoughts
My project, involving the application of chemistry-based techniques in the Opentrons, has great potential in the future! With recent research articles published describing the installation of imaging to view hydrogel cross linking, manufacturing grippers to move labware, and even using computer vision to monitor colorimetry titrations. The possibilities are truly endless! However, my journey is yet to finish. My next goal involves the combination of visual techniques and AI segment modelling to allow the Opentrons to distinguish between filled and empty wells in a reservoir.
Lastly, I wanted to express my utmost gratitude to Dr Hessam Mehr for taking me as a summer intern and letting me tinker with the Opentron Flex. I have learned and had exposure to so many aspects of the lab and gained skills I could never have imagined under his guidance. This has been such a unique opportunity, and I could not have had a better research group to have this experience with!
I hope you enjoyed reading my blog post, if anyone was interested the OnShape Designs for the HPLC vial rack and Extraction Arm Flange are linked below.
Leave a Reply
You must be logged in to post a comment.